Imagine this: you’re baking a yummy cake, and out of nowhere, your Viking oven or other brand stops working. A broken oven can be very annoying, especially when you are trying to make a meal. This easy guide explains the usual reasons why an oven keeps shutting off. It covers both gas and electric ovens. Plus, it gives simple steps to help you start cooking again without any problems.
Understanding Why Your Oven Shuts Off Unexpectedly
Unexpected shutdowns of your oven can happen for different reasons. They could be simple, like a tripped circuit breaker, or harder to fix, like a broken heating element. Before you start fixing anything, it’s important to know how your oven works. Most modern ovens have safety features that stop them from getting too hot. This helps prevent fires and other dangers.
Another common issue is a broken thermostat. This part controls the temperature of the oven. If the thermostat is not working right, it might show the wrong temperature. This can cause the oven to turn off too soon or not heat up enough. Finding out what the trouble is can help you find a good solution.
Differentiating Between Gas and Electric Oven Issues
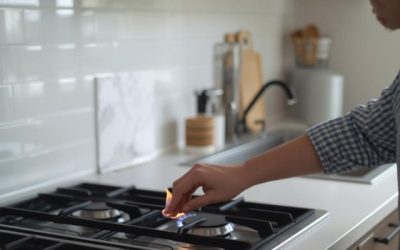
Gas and electric ovens can have similar issues, but each type has its own problems. Gas ovens need a steady flow of gas to keep the burner going and to hold a stable temperature. If the gas valve is broken, the burner is blocked, or there isn’t enough gas, the oven may shut down.
Electric ovens depend on heating elements to produce heat. If the heating element fails, a wire breaks, or there’s an issue with the power supply, the oven won’t heat. It’s important to know the differences between these ovens for better troubleshooting and repairs.
Identifying Common Signs of Malfunction
Noticing the warning signs of your oven may shut down can help you fix the issue before it gets worse. A clear sign is when the oven does not heat up at all. This may mean there is a problem with the power supply, heating element, or thermostat.
Some signs are not so easy to see. If your oven often undercooks food or takes a lot longer to cook, it might mean the heating element or thermostat is failing. Also, strange sounds like clicking or buzzing from the oven can indicate electrical problems or a broken fan.
Preparing for DIY Fixes: What You’ll Need
Taking on DIY repairs for your oven can be a great experience. However, it is important to prepare carefully. Before you start fixing anything, make sure to collect the tools you need and think about safety first.
Having the right tools ready can make your work easier and stop you from wasting time. Always keep safety as your main focus when you work with any electrical appliance.
Essential Tools and Safety Equipment
Before doing any repairs, make sure you have these items:
- Screwdrivers: You need a set of both Phillips and flat-head screwdrivers in different sizes to take off panels and reach internal parts.
- Multimeter: This tool checks electrical connections and voltage. It helps in finding problems with thermostats, heating elements, or wiring.
- Work Gloves: These keep your hands safe from sharp edges, heat, and electric parts.
- Safety Glasses: These protect your eyes from debris, which is very important when working with small screws or electrical parts.
Step-by-Step Guide to Troubleshooting Your Oven
After you have gathered your tools and made sure you are safe, you can start troubleshooting your oven. It’s important to work step by step, looking at each possible problem. This organized way will help you find and fix the issue better.
Step 1: Checking Power Sources and Connections
The first step is to check for any problems with the power supply to your electric oven. Start by making sure the oven is plugged in and that the outlet has power.
Next, find your home’s circuit breaker box. Look for the breaker that controls the oven circuit. If it has tripped, reset it by turning it off and then on again. Also, check the oven’s power cord for any visible damage like fraying or cuts. These issues can be hazardous and may need you to replace the cord.
Step 2: Inspecting the Oven’s Thermal Fuse and Heating Elements
If the power supply is okay, the next step is to check the oven’s safety features and heating parts. The thermal fuse is an important safety tool. It stops the oven from getting too hot by turning off the power if the temperature goes too high.
You can use a multimeter to see if the thermal fuse is broken and needs to be replaced. Also, look at the heating elements for any damage, like cracks or blisters. If a heating element is damaged, it will need to be replaced to ensure proper heating.
Preventive Measures to Avoid Future Shutdowns
Troubleshooting can help with current problems, but taking steps to prevent them can lower the chances of future oven shutdowns. Regular maintenance keeps your appliance working well and helps it last longer.
Incorporate these tips for the best oven performance:
- Clean Regularly: Wipe the inside of the oven after each use. This will stop grease and food from building up. Buildup can affect heating and airflow.
- Check Door Seals: Make sure the door gaskets are clean and in good shape. A tight seal helps keep a steady temperature and stops heat from escaping.
- Inspect Vents: Regularly remove anything blocking the oven’s vents and fans. This keeps airflow good and prevents overheating.
Contact Viking Professional Service for Reliable Repairs
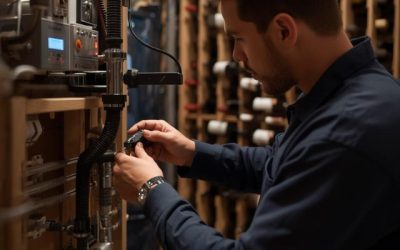
If you have tried all your options for fixing the problem or if you are not sure about doing repairs yourself, it’s important to get help from a professional. Trying to make complicated repairs without enough skills can be risky and might harm your oven even more. Viking Professional Service offers dependable oven repair services. We guarantee to provide efficient solutions to all your oven issues, including continuous shutdowns. Our expert technicians have the knowledge and experience to diagnose the problem accurately and carry out the necessary repairs.
In addition to repair services, we also offer preventive maintenance plans to help you avoid future shutdowns and extend the life of your appliance. Our team will schedule regular check-ups to ensure everything is in optimal condition and address any potential issues before they escalate. By trusting Viking Professional Service, you can rest assured that your oven will be back to working seamlessly in no time.
Conclusion
If your oven keeps shutting off, it can be very annoying. It is important to know why this happens, whether your oven is gas or electric. This knowledge will help you fix the problem. You can improve your oven’s performance and stop it from shutting down by following some maintenance tips and upgrading any old parts. For professional repair for your oven, get in touch with Viking Professional Service. Always remember that taking care of your oven regularly is crucial to keeping it working well. For more tips on caring for your appliances, check out our blog on Simple Viking Oven Tips and Tricks to Extend Appliance Life.
Frequently Asked Questions
Can a dirty oven cause it to shut off?
Yes, a dirty electric oven can lead to overheating and make it shut off. Built-up grease and food scraps can block airflow. This can affect how the heating element keeps a steady temperature. It might also cause the appliance to activate its safety features.
How often should I perform maintenance checks on my oven?
It’s a good idea to check your electric oven every three to six months. You should clean the inside, look at the door seals, and make sure the ventilation is working well. Taking care of your appliance regularly can help stop problems and make it last longer.
Is it worth repairing an old oven that keeps shutting off?
Deciding if you should fix an old electric oven depends on how big the problem is, how much it will cost to repair, and the overall condition of the appliance. If the problem is serious or the oven is close to the end of its life, getting a new, energy-efficient model could be a better choice.