A bright wine cooler shows off your collection and helps you find your favorite bottle easily. But when the light bulb goes out, you need to replace it. This job might look hard, but it is quite simple. This guide will give you everything you need in replacing a wine cooler light bulb like a pro. It will help keep your wines glowing and easy to see.
Steps for replacing a wine cooler light bulb
Replacing a light bulb in your wine cooler is an easy task that many people can do on their own. First, make sure you have all the tools and materials you need.
You will typically need a new light bulb, a soft cloth, and maybe a small screwdriver. After you have gathered everything, you can follow these steps.
Choosing the right replacement bulb for your wine cooler
Before you start changing the light bulb, it is important to pick the right one for your wine cooler. Wine coolers need certain types of light bulbs. Using the wrong one can cause bad lighting or harm the cooler.
Check your wine cooler’s user manual or find a label inside it. This will help you know the right bulb type, wattage, and voltage to use. Usually, wine coolers use either small incandescent appliance bulbs or LED bulbs.
LED bulbs are getting more popular because they save energy and last longer. However, incandescent bulbs can also work well in this cooler.
Preparing the wine cooler for bulb replacement
- The first step is to unplug the wine cooler from the power outlet. This helps to stop any chance of electrical shock. Find the power cord at the back of the cooler and gently disconnect it from the wall socket.
- Next, take away anything that blocks access to the light bulb. You may need to remove wine racks or shelves. To make it easier, it’s a good idea to pull the wine cooler slightly away from the wall, if you can.
- Be careful not to move it too far or on uneven surfaces. This could harm the appliance or cause injury.
Removing the old light bulb and installing the new one
Examine the light bulb socket closely to know how to take out the old bulb. Most wine coolers use a simple twist-and-pull method for changing the bulb.
- Gently twist the bulb to the left to loosen it from the socket.
- When it is loose, carefully pull the bulb out of the socket without using too much force.
- After removing the old bulb, take your new light bulb and match it with the socket.
- Then, gently twist it to the right until it is securely in place.
Testing the new light bulb and troubleshooting any issues
Once you have put in the new light bulb, plug the wine cooler back into the power source. Then, turn on the cooler and see if the light comes on. Hopefully, everything will work well.
If the light does not come on, check to make sure the bulb is tightly screwed in and that the cooler is getting power. Sometimes, the problem might not be just the light bulb.
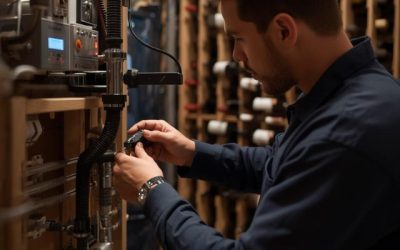
If you think there might be a wiring issue or another problem with your wine cooler, it’s a good idea to ask a skilled appliance technician to look at it and fix the issue safely.
Properly disposing of the old light bulb
Now that you have successfully replaced your wine cooler light bulb, it’s essential to dispose of the old bulb properly. Incandescent and LED bulbs have different disposal guidelines due to their composition.
Incandescent bulbs can be disposed of with regular household trash, as they don’t contain any harmful elements. However, avoid throwing them loosely in the trash.
It’s best to wrap them in a newspaper or place them in a small box to prevent breakage and potential injuries.
|
Bulb Type |
Disposal Method |
|
Incandescent Bulb |
Wrap in newspaper or place in a box before discarding with regular household trash. |
|
LED Bulb |
Check for local recycling programs or designated drop-off locations. |
Conclusion
In conclusion, replacing a wine cooler light bulb can be easy if you follow the right steps. First, choose the right replacement bulb. Then, prepare your wine fridge for the change. Be careful when you install the new bulb. It is important to test it before throwing away the old one. If you have any problems, check the troubleshooting tips. Always keep safety in mind during this process. If you want to know more tips for your wine cooler, check out our blog post on DIY Wine Cooler Shelving: Customizing Your Storage Space. Cheers to a bright and working wine cooler!
Frequently Asked Questions
Are there any common issues or challenges when replacing a light bulb in a wine cooler?
One common problem is finding the right light bulb. Wine coolers usually need certain sizes and wattages. Some coolers might have a cover or shield over the bulb. You will need to remove it carefully to change the bulb.
Are there any safety precautions to consider when replacing a wine cooler light bulb?
The most important safety tip is to unplug the wine cooler before you begin. This helps prevent the chance of electrical shock. Be sure not to touch the new bulb with your bare hands. The oil from your skin can make it wear out faster.
Does replacing the light bulb in a wine cooler require professional assistance or can it be done by oneself?
In many cases, changing a wine cooler light bulb is an easy job. You can do it by yourself without needing help from a professional. But if you face any problems or are not sure about a step, it’s a good idea to reach out to a qualified appliance technician.