The control knobs on your Viking stove are very important for its smooth operation. Over time, these knobs can get worn out or damaged. This can affect how well your burner works. It’s essential to know when to replace them for the safety and efficiency of your stove. In this guide, we will walk you through the simple steps in replacing stove control knobs. By following these easy instructions, you can ensure that your Viking stove continues to function flawlessly. Let’s dive in and make the process hassle-free for you.
Identifying When to Replace Your Stove Knobs
If your stove knobs become hard to turn or start to crack, it may be a good idea to replace them. Also, if the markings on the knobs fade away and make it hard to adjust the burner settings, you should think about getting new knobs. Keep an eye out for any wobbling or looseness when you turn the knobs. This could mean there is damage inside that needs a replacement.
Step-by-Step Guide to Replacing Stove Control Knobs
To replace your stove control knobs, first, turn off the gas supply for safety. Then, carefully take off the old knobs. Be sure not to harm the burner. Clean the area where the knobs sit before putting on the new ones. After the new knobs are on, reconnect the gas supply. Lastly, test the new knobs to make sure they work well. By following these steps, you can easily replace your stove control knobs without any trouble.
Turning off the Gas Supply
To safely replace the stove control knobs, you should first turn off the gas supply. Find the gas shut-off valve behind the stove. Make sure the valve is in the closed position to stop any gas from flowing. This step is important to prevent gas leaks while you change the knobs. Check that the gas is fully turned off before moving on to the next steps.
Removing the Old Knobs
- Gently pull off the old knobs from the control stems.
- If needed, use a flathead screwdriver to help.
- Make sure to remove them smoothly to avoid harming the stove surface.
- After the knobs are removed, check for any dirt or debris around the control stems.
- This will help in installing the new knobs efficiently.
Cleaning the Knob Area
Clean the area around the control knobs gently. Use a mild soap and a soft cloth. Do not use rough cleaners, as they can scratch the surface. Make sure to clean any small spaces and remove all dirt. After cleaning, dry the area lightly before installing the new knobs. Keeping this area clean is important for how your stove looks and works over time.
Installing the New Knobs
Place the new knobs onto the control stems. Make sure to line them up correctly for a snug fit. Push the knobs gently until they are secure and properly in place. Check that each knob matches the right burner by looking at the labels or placement guides. After you install them, turn each knob to ensure they work smoothly. This step helps confirm that the knobs are ready to be used.
Reconnecting the Gas Supply
To reconnect the gas supply, look at the model number of your gas range. Find the new control knobs that match it. Align the D-shaped openings of the knobs with the gas valve stem. Slide the knobs into place and press them gently to make sure they fit well. Once all the knobs are on, turn each one clockwise to fasten them onto the valve stems. Lastly, check the knobs by turning them off and on to make sure they work smoothly.
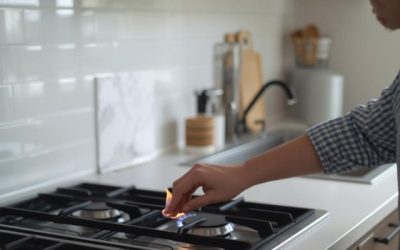
Testing the New Knobs
After you install the new knobs on your stove, the last step is very important – testing them. Turn each knob one by one to make sure they light up the right burner easily. Listen for the sound of gas flowing and watch that the burners light up quickly. Check that the knobs can change the flame strength smoothly. Testing the new knobs makes sure they work correctly, giving you a safe and efficient way to cook. Don’t skip this step after you change the stove control knobs to prevent any problems.
Conclusion
In summary, replacing stove control knobs on your gas range is an easy maintenance task. It can improve how your stove works and looks. By following the steps outlined above, one can ensure a safe and efficient cooking experience with their gas range. It’s essential to pay attention to the details when handling appliances, and your guide covers everything from installation to testing thoroughly. This comprehensive approach ensures that the new knobs are not only properly installed but also functioning correctly.
At Viking Professional Service, we offer reliable Viking stove repairs to ensure the longevity and efficiency of your appliances. Our team of experienced technicians is dedicated to providing top-notch service, whether it’s installing new control knobs or fixing any issues with your Viking stove. Trust us to keep your kitchen running smoothly so you can focus on what matters most – creating delicious meals for your loved ones. Contact us today for all your Viking stove repair needs! For more DIY tips, check out our blog on How To Fix Stove Uneven Heating.
Frequently Asked Questions
Are stove control knobs universal or do they vary by brand and model?
Stove control knobs can be different depending on the brand and model. This means they cannot be easily swapped. It’s important to find the exact knobs that match your stove. This way, you will ensure they fit well and work correctly. Knowing these differences will help you choose the right control knobs for your stove.
What tools are needed to replace stove control knobs?
To change stove control knobs, you will need the right tools. Get common tools like a screwdriver, pliers, and maybe a wrench. These tools will help you take off the old knobs and attach the new ones safely and easily.
Are there any safety precautions to keep in mind while replacing stove control knobs?
When you change the stove control knobs, make sure to turn off the gas supply first. Then, take off the old knobs. Clean the area next. Install the new knobs tightly. After that, be careful to reconnect the gas supply. Finally, test the new knobs to see if they work well. It is a good idea to wear safety goggles and gloves.